Hello and happy Friday! Today I’ve put together a design inspired by this midi sized blanket I sewed. It’s a baby pink background with a terrazzo print of navy, orange and white. It’s my take on modern art deco. When I found a rug that matched my blanket print, the visualization of this space just took off! I was envisioning a natural white crib for this space so I knew I had to start shopping at Babyletto. The acrylic rails to their Harlow crib make this piece really stand out. For this design, a matching dresser set fit the space I envision. I love to mix and match dressers and cribs, but sometimes a set is just too good to not stay cohesive. I kept the finishing accents simple, with room to add your own pieces already sourced, or to thrift new ones inspired by this design. Maybe a vintage lamp, a fun mirror or your own unique prints or artwork. For an added fun share, I placed a padded play mat by Gathre along with a modern toy bar in this nursery design. Every little piece is simple, yet very sophisticated for the modern baby! I hope you enjoyed this week’s design and I’ll be back next week with another one. Don’t forget to like my Instagram post and see the blanket print behind the design!
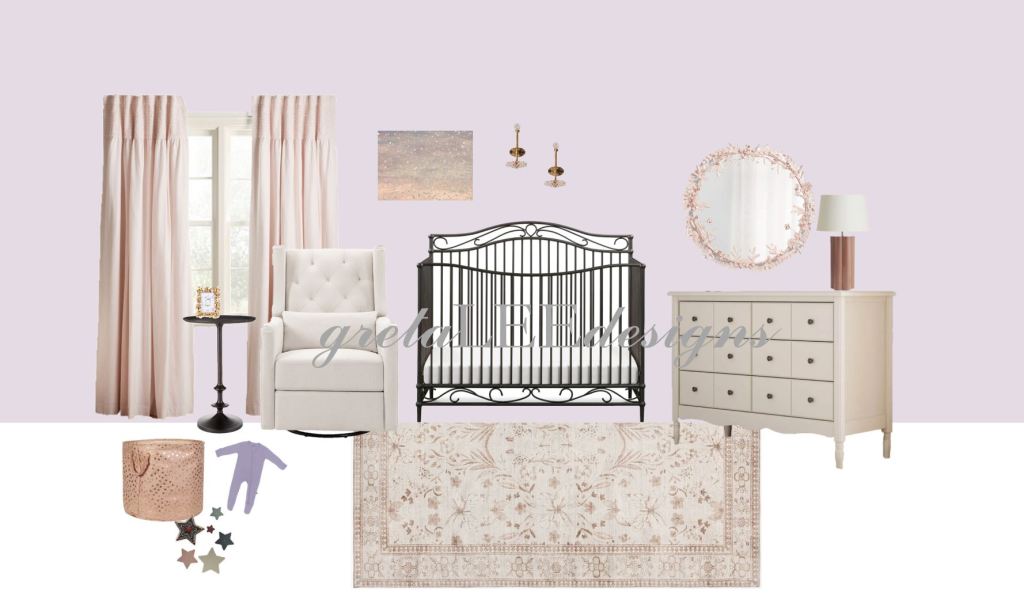
Do you ever find a piece of furniture and immediately want to build a room around it? How about just a color or print? I love finding a piece that speaks to me and curating a special space from it. The next 4 weeks I’m brining you just that every Friday! I recently started to sew baby blankets, and while I am not a pro sewer yet, it is brining me back to my creativity. I had the idea then to create a nursery design inspired by each print. Today, I am introducing you to the ‘Written in the Stars’ nursery design.
I started with this dreamy iron crib by Namesake. It looks like the perfect piece for your baby to fall asleep in, dreaming beneath the stars. If you checkout Namesake’s furniture pieces, you will find they have many sets to choose from. I paired the Noelle crib with this Liberty dresser. The dresser is feminine with a touch of vintage, keeping things true and classic. Timeless pieces are where I dream the most, so I hope you do too when seeing these two paired together. From there I took the colors from the blanket, and paired simple yet sophisticated accents to this design. My favorite has to be the rug. It’s washable and a really great price! I included some fun accents as well that are always needed in a nursery or home. A photo frame, these Mushie Nesting Stars, and a Kyte Baby footie for your little one to play or sleep in. Make sure you check out my links below to each piece. Also make sure to head to my Instagram @stylinglifebyg to see the blanket that inspired this all! I hope this brings you a spark of inspiration as you design or refresh your spaces! Thanks for stopping by – xo, G
Happy FIRST day of Summer!! I’m getting this post out just in time for all the Summer time vibes. Do you ever just look at something, sometimes smell or taste a thing, and it takes you back? Well, that’s how my mind acted when piecing together my latest design inspo below. I’m not sure if it was the red, white and blue – my favorite Summer time memory – or if it was the crisp, cool and relaxing patterns and tones, but it brought me to Summer! Take a look below and let me know what you think. Where is your dream location to be in the Summer? XO, G
Hi everyone! I’m back after unknowingly taking a few months off. Not sure what happened to 2021 after this Summer, but I’m feeling creative after having signed on a future home. You can stay up to date on all my current décor set ups and fun updates on my Instagram @stylinglifebyg. SO, with our new home going up as we speak, I’ve been starting to get some ideas before we move. Today I’m sharing the inspo I have for my future laundry room. Check it out below and let me know what you think. Cheers! XO, G
The heart of almost every home is the kitchen! You’re in there for at least three meals of the day, and if you think about it, whenever there is a gathering of people, there has to be food. For this reason, it’s a no brainer why every modern floorplan today leans towards an open concept – grabbing a snack at the large kitchen island and being able to sit close by on your couch. My apartment is already like that and I can’t imagine living any other way! When it comes to design though, the overall aesthetic of your homes floor, walls and cabinetry can really make a difference as to how you design your living spaces. The kitchen typically creates the foundation for a home’s overall feel and style, so today I’m bringing a design totally opposite from my current modern, bright and clean lined apartment kitchen and living room.
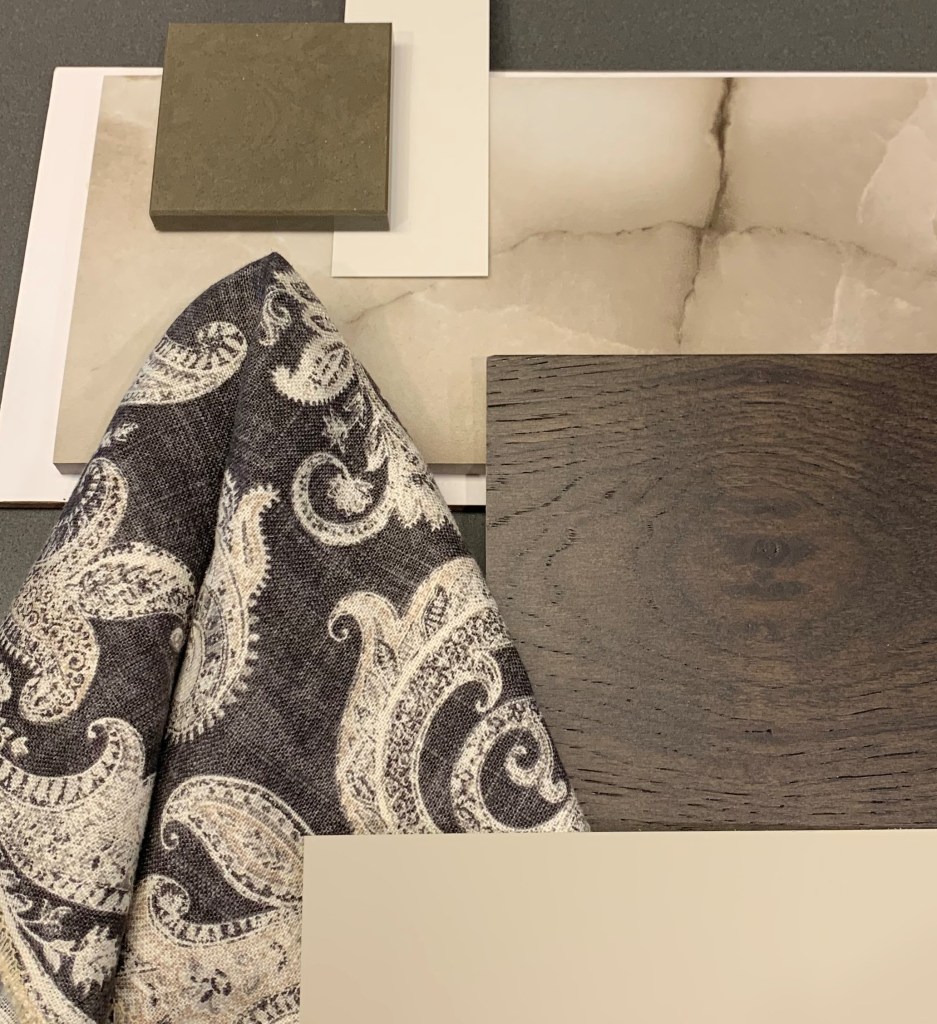
My inspiration started here:
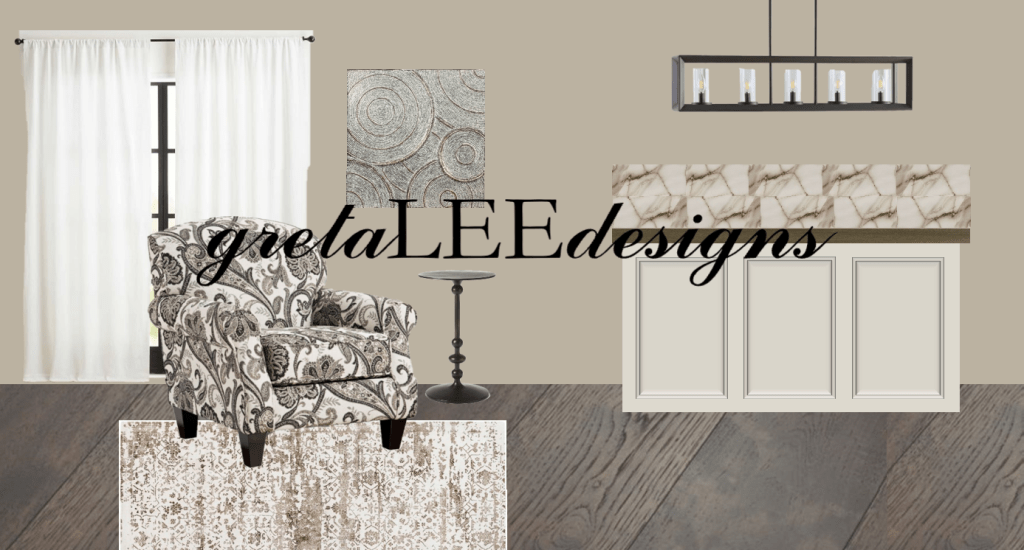
And led me to this:
A warm, very traditional, with pops of patterns mixed along! I really started with the flooring and cabinet color. Mixed in a more neutral kitchen surface and backsplash to bring the pattern alive as the star of this room. Let me know what you think and if you’re wondering how else I would complete this look. A couch, pillows, bar stools, anything. I’ll have everything linked down below. Thanks for checking it out. XO, G
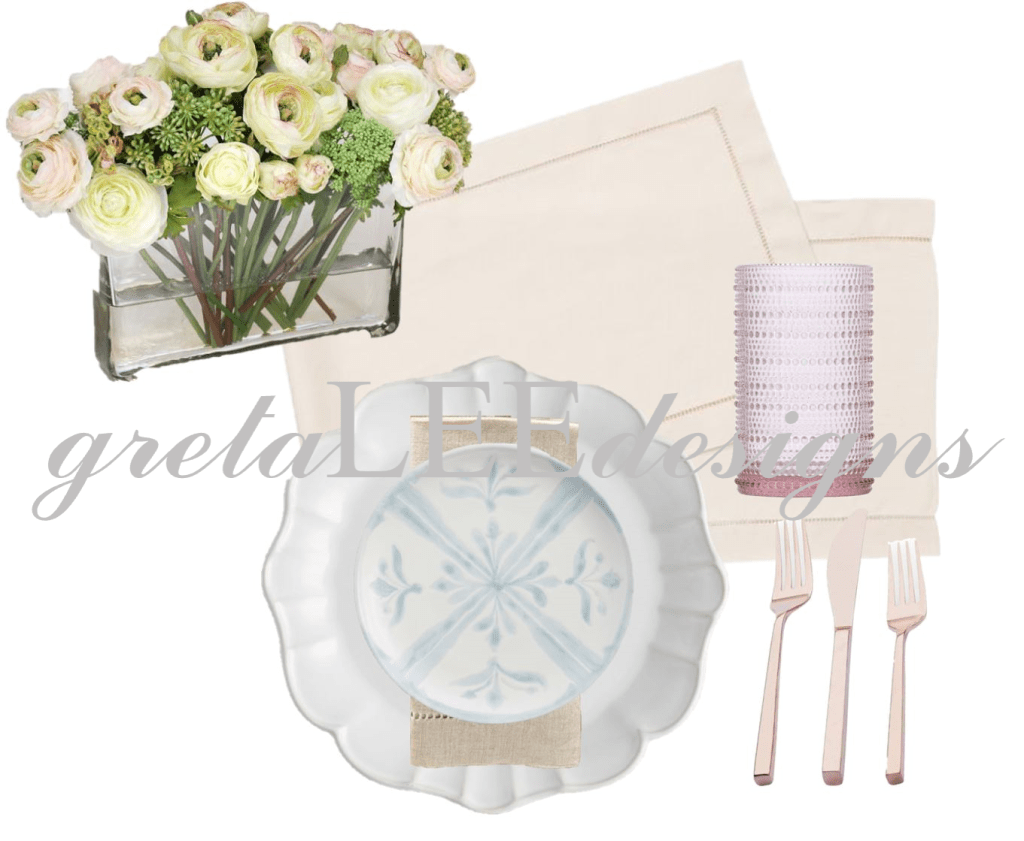
Officially into Spring over here! I needed to bring something new to the blog and I’ve been envisioning a girls brunch set in a traditional coastal designed home. SO, here it is! I went over to Pottery Barn to start; I feel like they always have just the right amount of traditional yet more transitional pieces when it comes to looking for that style. The drapery and wall color really started this palette and then I knew I needed a pop of color. The main focus of this Spring Time Dining set up though is the place setting! Everything is from Pottery Barn – they just had the most perfect pieces to pair together. Monique Lhuillier has a new line with them and it’s just what you need to set the most perfect table for a Sunday brunch. I made this one girly! Check it out and let me know what you think. I’ll have everything linked below! XO, G
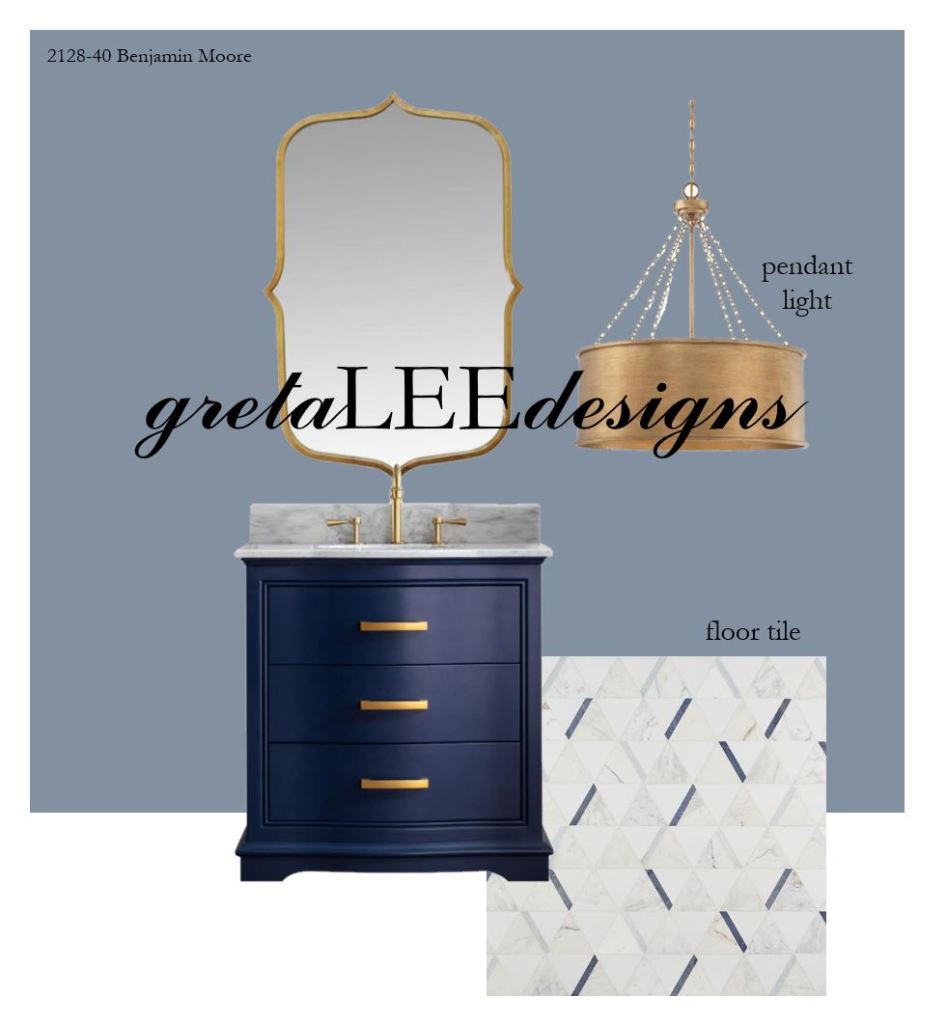
I was feeling inspired, so here’s the inspiration for you to enjoy too! I often think of how dramatic I can make a powder bath, and how that looks for different styles and colors. I designed an emerald green powder bath not so long ago, but lately I’ve been drawn to navy and gold. I was just scrolling through The Home Depot’s website when the vanity popped out at me and the rest fell into place. This powder bath has a more fun and transitional style to it than my first one. Let me know what you think! Links to every design element will be below.
Today I am sharing some inspiration for a men’s study room, or home library. I started with the colors and fabrics and then from there worked to source the furniture pieces. I hope you find this just as inspirational as I did!
I started with these fabrics. The patterned stripe was a fun addition, and the army green leather brought in that rustic pop I envisioned for the space. Here below is the finished inspiration. By finding the main furniture pieces – a desk and chair, accent chair, the rug and wall art, this men’s study is on its way to completion! All that would be left is the styling of décor.
Here is everything linked. Contact me with any questions and if you are in need of inspiration for your space! XO, G
Keeping your kitchen organized can seem like a daunting task. Organizing anything at all actually can seem like more work than it needs to be. I want to share with you though how I got excited about organizing my kitchen cabinets and what I purchased to keep them looking clean and clutter free!
Plates/Bowls/Glasses
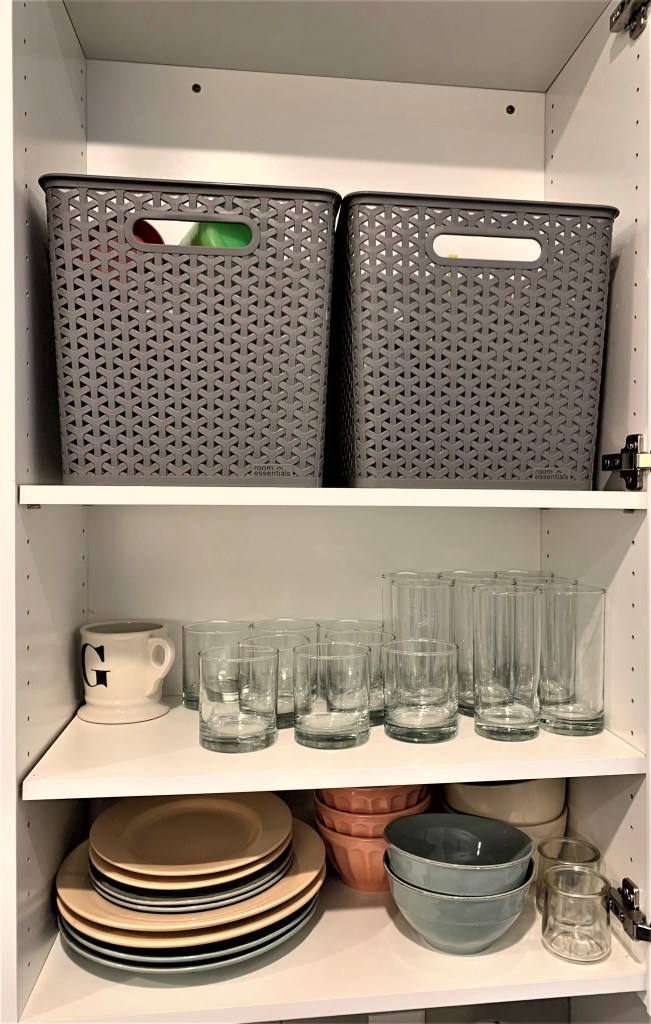
Plates, Bowls, Glasses, Organized Water Bottles & Tumblers
This is a cabinet that is getting opened everyday! I made sure to keep what was in here a necessity, and the minimum of what we’d use. Plates and bowls are on the bottom, while glasses and everyday mugs are above. Since our cabinets are so high I picked up some organizing bins and in each one I have tumblers and water bottles.
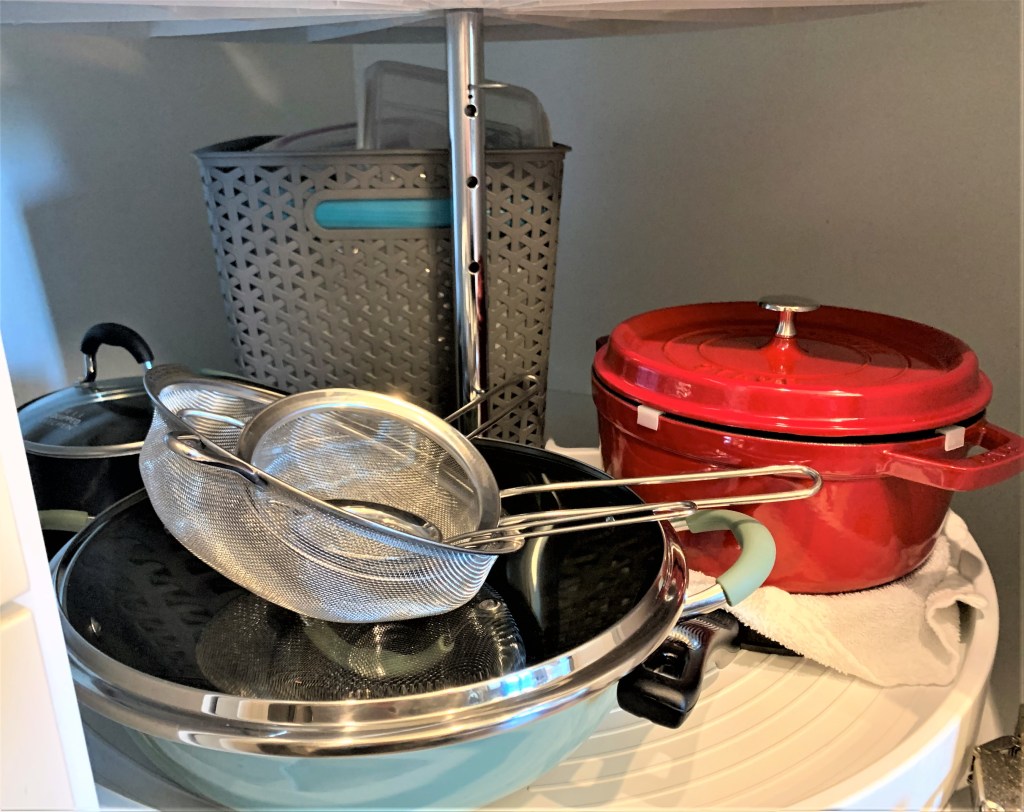
In our kitchen it was kind of a challenge to store our pans and pots. There is really only the tall pantry and one small bottom cabinet that are deep enough for pots and pans to be placed. Purchasing this pan and lid organizer from Target though helped us maximize the one small cabinet. Those are the ones we use everyday, minus the lids kept towards the back, so all of our other bigger pans & pots could be stored in other areas.
Baking/Entertaining
Baking & EntertainingEntertaining
These are my two favorite cabinets! In the first one I organized my baking pans and mixing bowls and then on the very top shelves of both cabinets I have entertaining dishes that aren’t used as often. The two wire racks we ordered are perfect for adding another shelf for stacking more things in the high cabinets. We ordered them here from Bed Bath and Beyond.
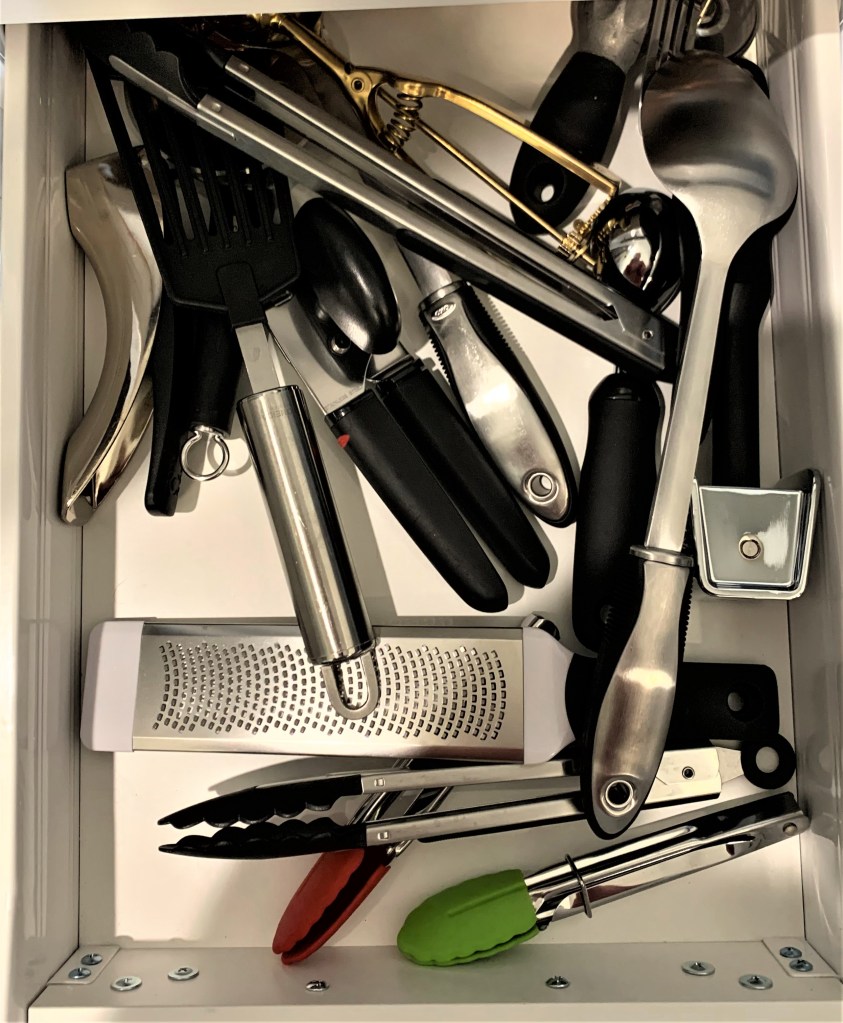
Silverware/Utensils
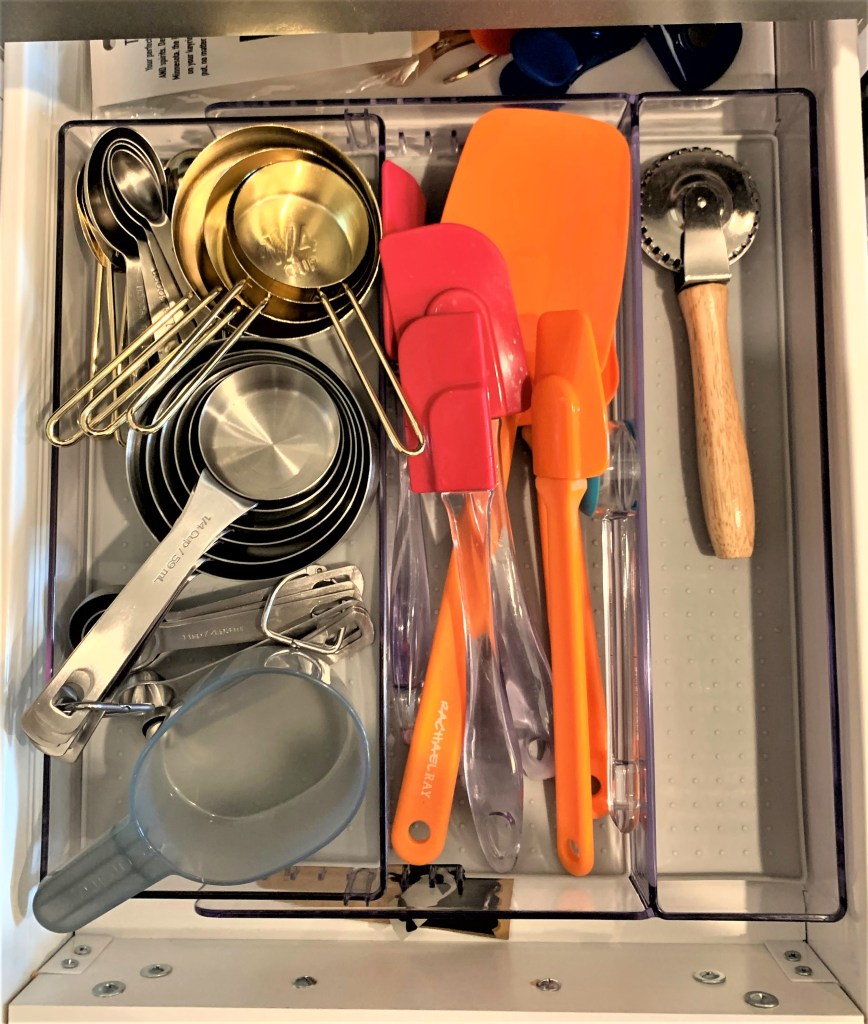
Silverware & Knives Baking Utensils Utensils
As you can see, two drawers are more organized than the other one. I knew for the bigger utensils, putting them in a drawer was fine, as long as it wasn’t too cluttered. I’m going to try and minimize what I put in this drawer. As for silverware, knives and some baking tools I picked up these drawer organizers from Costco. They aren’t hard to find at either Home Goods, TJ Maxx and even Target. Here are some similar ones. Any extra small things like chip clips I keep behind the organizers where I’m not needing to access those things as often.
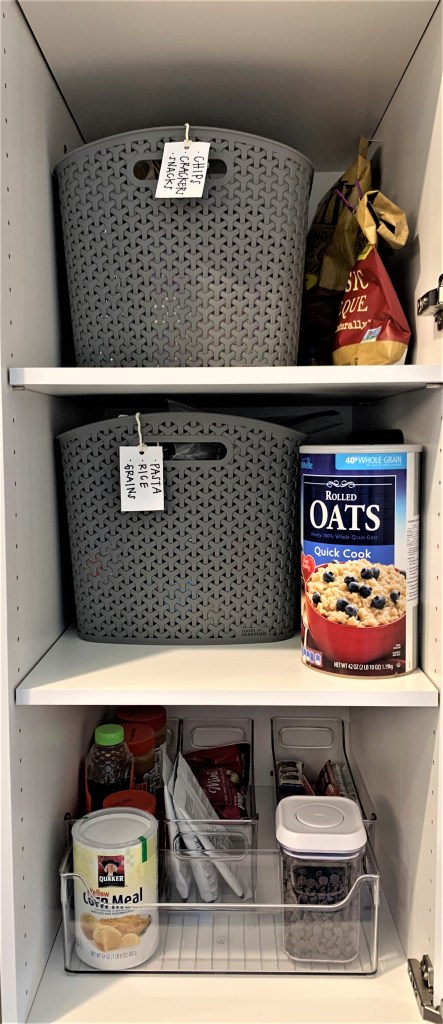
Pantry Staples
Pantry Cabinet PantryBaking Cabinet – OXO ContainersCooking, Baking and Entertaining
Pantry organization is the number one cabinet or in some homes, ‘rooms’ that needs to be organized! I thankfully already had a few of the bins used to organize food, spices, and baking things, but they aren’t hard to find when needed. I’ve loved these Room Essential bins for organizing a lot of things in our apartment. Target has a ton of different sizes and colors in them. As you can see I used two big ones for snacks and grains, another one for extras and have more through my apartment used for things like cleaning supplies. I like to be able to pull a bin out and see what’s all inside. Rather than dig around a cabinet, it makes things easier! I do the same thing with my spices, and small baking items. Another storage bin I like using are these iDesign fridge and freezer bins from Amazon. I have 4 of them lined up in the pantry for granola bars, extra baking things and large peanut butter and honey jars. They’re great for keeping things separated yet together. You can also easily find these at other stores too! The first two I bought were from TJ Maxx. Last, but not least, are my OXO Pop containers helping me stay organized. I got these for a huge deal when I found a set at my local Tuesday Morning. I always see them around Home Goods and TJ Maxx though. You can customize the sizes more to what you need them for then. I mainly wanted 4 for flour, sugar, brown sugar and powdered sugar. The extras I keep fun things in, like chocolate chips and popcorn kernels. Here on Amazon you can shop their collections.
If you would like to see this in a bigger ‘picture’, check out my kitchen tour video that I’ll be posting on my Instagram (@stylinglifebyg) in a couple of days. I even share more of my cabinets than what is pictured in the post. I hope you can check it out! XO, G
So, you’ve all scrolled through Pinterest kitchens and wondered why yours doesn’t look like that, right? Well today I want to change that for you! I have some tips and tricks below on how you can make your kitchen look designer – even if the cabinets, back-splash and appliances aren’t. I want to show you then my apartment kitchen for fun and where I found certain pieces. Let’s get started!
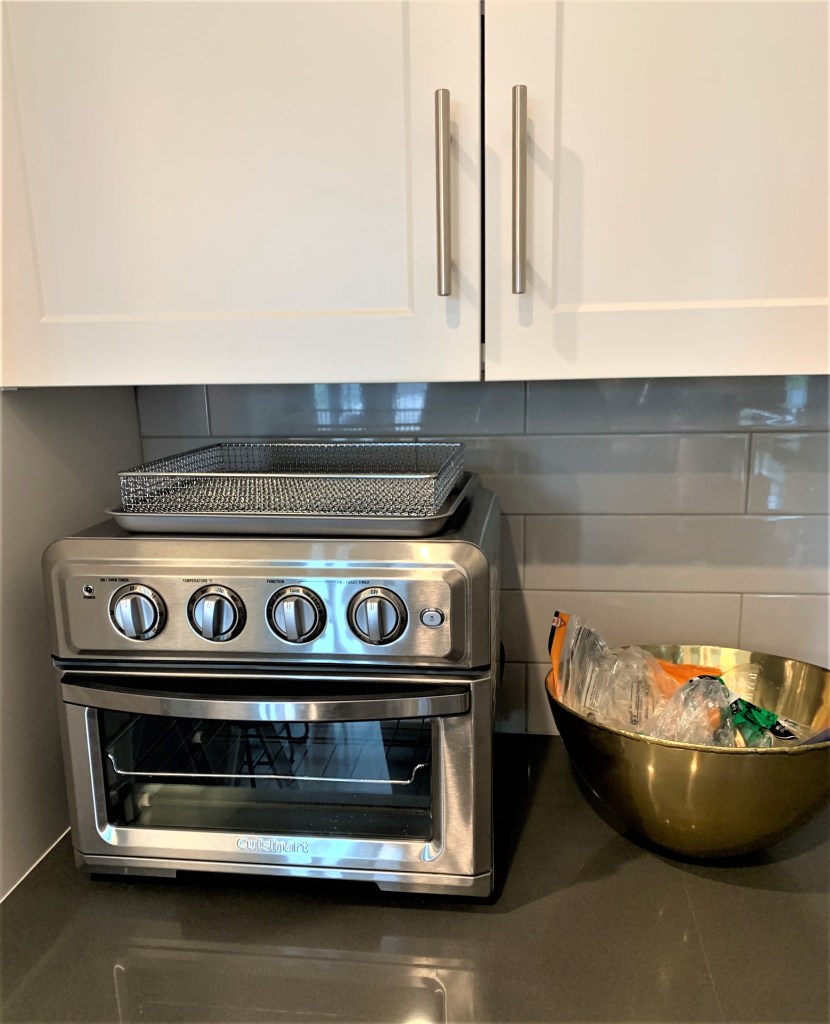
De-Clutter
To allow the eyes to see simplicity and beauty, they have to see less and the bones of what is there making a space. In any kitchen, clear as much off the counter as you can. If you can’t, make sure each item is strategically placed, and accordingly placed. In my kitchen I have my Kitchen Aid stand mixer in the small corner, right next to the cabinet of baking ingredients. The opposite corner our toaster oven is placed right next to the bread bowl. Some big appliances need to be on the counter, but as long as they aren’t all next to each other it won’t look cluttered.
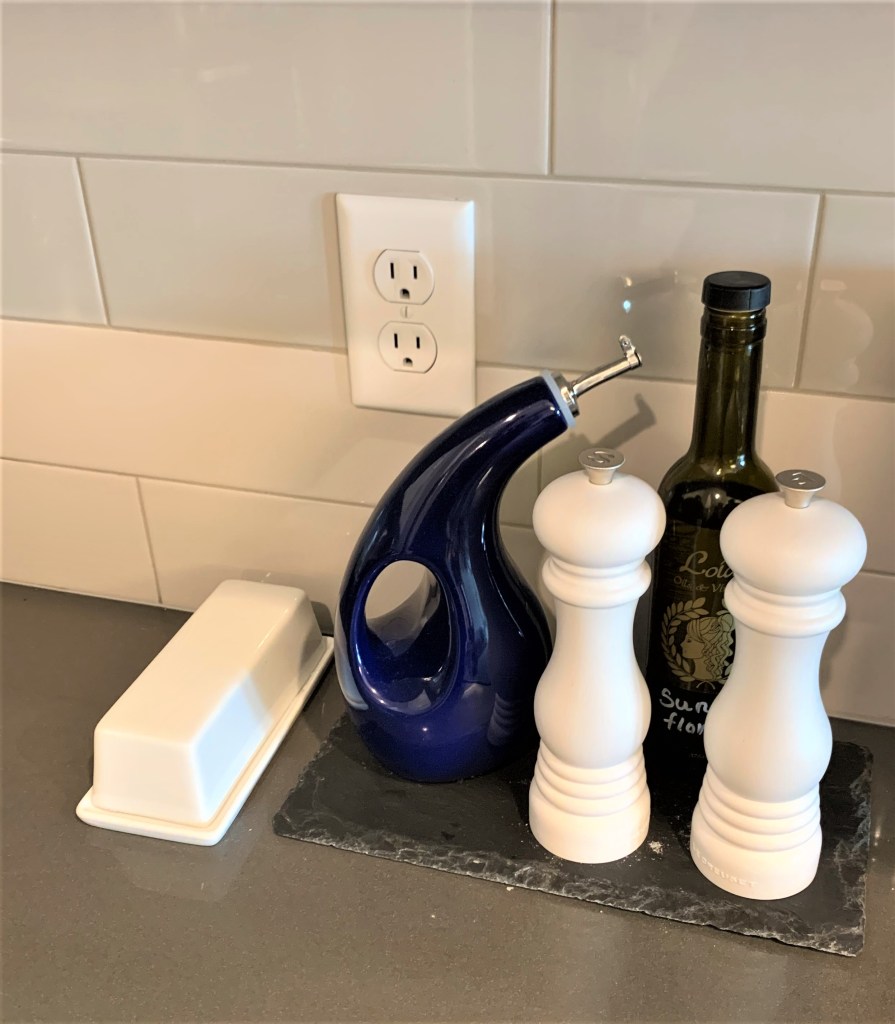
2. Stylize in Groups
This trick may contradict ‘de-cluttering’, but you can’t set one thing out and allow for it to work on its own. Styling the items you have in your kitchen should be done in pairs, or groups. Like I mentioned with the toaster oven being next to the bread bowl, I paired the two together so it would look more cohesive. I also did this next to the stove top with my salt and pepper shakers and oils. Things that are used often can be left out and styled together to create a flow of design. I then added in little decor elements here and there like a faux plant next to my mixer and a utensil pot on the other side of the stove.
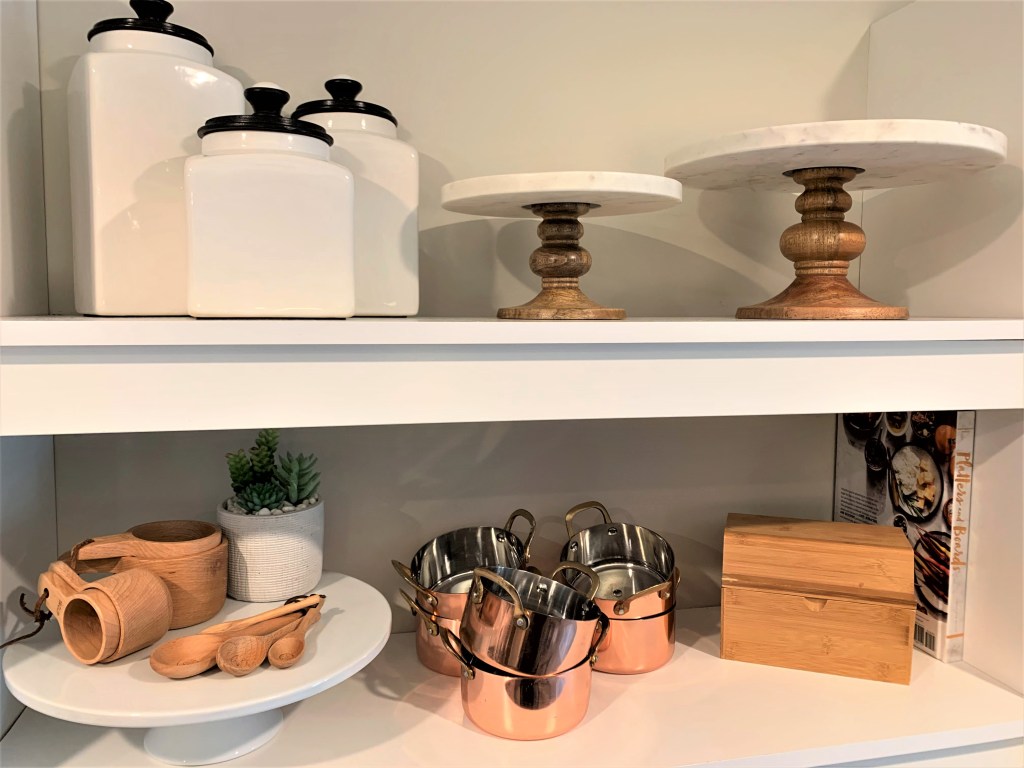
3. Be You
None of the items I used to stylize my kitchen were purchased for that reason. Every appliance and cooking item was bought before because I love to cook and bake fun things! The couple decor pieces were things I picked up knowing I wanted some gold, and green in my kitchen. The two open shelves I have are versatile to style and in any kitchen it should be styled to who the person is. If you are more simple, you may have nothing on your counter, or if you love to entertain you may have more plates and bowls on display. Create a space that is designed for you!
Of course if you would ever like some help on stylizing your kitchen, or any part of your home, you can email me at gretaleedesigns@gmail.com. I hope this post brought you some inspiration. Thanks for stopping by! XO, G